# mac相关笔记
# 1. 在mac上安装homebrew
- 进入终端
/bin/zsh -c "$(curl -fsSL https://gitee.com/cunkai/HomebrewCN/raw/master/Homebrew.sh)"- 选择1
source /Users/zmx2321/.zprofilebrew -v
# 2. 在mac上配pip
sudo easy_install pip
# 3. 在mac上配置ssh
- 可以解决github上传玄学问题
- 查看是否存在ssh
cd ~/.ssh- 如果存在需要先删除
mkdir key_backup $ cp id_rsa* key_backup $ rm id_rsa*
- 配置ssh
ssh-keygen -t rsa -C zmx2321@163.com- 一路回车
- 查看是否安装成功(查看公钥)
cd ~/.sshcat id_rsa.pub
- 进入访达home文件可以查看.ssh文件
- 前往 => 前往文件夹 => 输入~可进入home文件
- .ssh是隐藏文件
- 前往 => 前往文件夹 => 输入~/.ssh可直接到公钥和私钥创建的目录
- 登录Github账号,点击Settings,点进去找到Personal settings。点击SSH and GPG keys。向SSH服务器(github.com)Add自己的SSH Public Key后,github.com将这个SSH Key与你的github账号关联起来,你的机器(Mac git client)将有写权限向你github账号名下的remote repository进行push提交代码
- 填写标题,把刚才生成的公钥内容粘贴到Key中。点击Add SSH key
cd cd ~/.sshcat id_rsa.pub
- 测试连接:ssh -T git@github.com
- Hi zmx2321! You've successfully authenticated, but GitHub does not provide shell access. => 表示配置成功
- 设置用户信息
- git config --global user.name "zmx2321"
- git config --global user.email "zmx2321@163.com"
- 拷贝私钥的时候容易出现权限问题
- Permissions 0777 for '/Users/zmx2321/.ssh/id_rsa' are too open
- 修改id_rsa权限即可
chmod -R 700 /Users/zmx2321/.ssh/id_rsa - ssh -T git@github.com
# 4. 在mac的隐藏文件
- 显示隐藏文件
defaults write com.apple.finder AppleShowAllFiles -boolean true;killall Finder
- 再次隐藏文件
defaults write com.apple.finder AppleShowAllFiles -boolean false;killall Finder
# 5. mac上的基本快捷键
- 撤销和恢复撤销
- 撤销:
command + z - 恢复撤销:
shift + command + z
- 撤销:
- 注释
- 注释一行代码:
cmd + / - 注释一整段代码:
option + shift + A
- 注释一行代码:
- 查找替换
- 查找:
cmd + f - 替换:
option + cmd + f
- 查找:
- 全屏
ctrl + cmd + f
- 删除文件:
cmd + 右上角删除 - 在已有的访达窗口新建访达:
cmd + n - 如果你同时按下Option+Command键并点击桌面上空白的区域,就能把除Finder窗口以外的所有窗口隐藏起来,直接显示桌面。分别点击Dock栏上各个相关应用程序图标就可以解除窗口的隐藏状态了
- 点击某类软件,
option+cmd+q,关闭某类软件所有 open .: 打开当前文件夹
# 6. 在访达打开终端
- 访达 => 服务 => 服务偏好设置 => 可以配置快捷键
- 由于我装了item2,我这里配置了item2的快捷键:
- 点击文件夹,按住键盘
shift + cmd + m会直接呼出终端
- 点击文件夹,按住键盘
# 7. mac报错
# 7.1. 权限相关
- warning: Insecure world writable dir /opt/homebrew/sbin in PATH, mode 040777
lolcat -h的时候会出现- /System/Library/Frameworks/Ruby.framework/Versions/2.6/usr/lib/ruby/2.6.0/universal-darwin20/rbconfig.rb:229: warning: Insecure world writable dir /opt/homebrew/sbin in PATH, mode 040777
- 提示含义:目录被赋予777的权限,不安全
- 解决方案
- 将提示权限改为775,问题即可解决
sudo chmod go-w /opt/homebrew/sbin
sudo chmod R 775 /opt/homebrew
1
2
# 8. mac终端动画
- 使输出内容有颜色渐变
brew install lolcatll | lolcat
- sl 跑火车
brew install slsl | lolcat
- 屏幕代码滚动
brew install cmatrixcmatrixcmatrix | lolcatcmatrix -C cyan/blue
- 把终端变成五颜六色的海洋馆
- 目前我的电脑有报错,疑似权限问题
brew install asciiquariumasciiquarium
- 会说话的 ascii 奶牛
brew install cowsaycowsay worlds | lolcat
- 鸡汤
brew install fortunefortune | cowsay | lolcat
# 9. 在mac上配置item2
# 9.1. 安装item2
- 安装item2
- 安装Homebrew
- 可以直接使用,但他可以更好看一些
# 9.2. 配色
- 下载seti_ui https://github.com/willmanduffy/seti-iterm 放到指定的位置
- 打开iterm2->preferences->profiles->colors->colors presets->import选中刚才的⽂件
- 让命令行变色
- 开启term颜色支持
vi ~/.bash_profile
export CLICOLOR=1
export LSCOLORS=GxFxCxDxBxegedabagaced
export PS1='\[\033[01;32m\]\u@\h\[\033[00m\]:\[\033[01;34m\]\w\[\033[00m\]\$'
1
2
3
# 9.3. 准备工作
- 一般终端默认的Shell都是Bash,执行下列命令可以查看当前终端用的Shell类型
echo $SHELL- 这里我们推荐使用Zsh
- 查看所有终端
cat /etc/shells
- 设置Zsh为默认Shell
chsh -s /usr/local/bin/zsh
- Wget
- 寓意 “World Wide Web” 与 “Get”,一个从网络上自动下载文件的工具,支持通过 HTTP、HTTPS、FTP 三个最常见的 TCP/IP协议 下载,并可以使用 HTTP 代理
brew install wget
- 安装Oh My Zsh
- 由于Zsh配置让人从入门到放弃,极其复杂繁琐。直到Oh My Zsh 的出现,自带基本配置,才让我们从中解脱出来
- 这里使用wegt工具自动安装
wget https://github.com/robbyrussell/oh-my-zsh/raw/master/tools/install.sh -O - | sh- 或
curl -L https://raw.github.com/robbyrussell/oh-my-zsh/master/tools/install.sh | sh - 也可以使用国内地址
sh -c "$(curl -fsSL https://gitee.com/shmhlsy/oh-my-zsh-install.sh/raw/master/install.sh)"- 在windows环境下得linux子系统
- 接下来的配置全在oh my zsh中
- 查看oh my zsh所有的主题 =>
ll ~/.oh-my-zsh/themes
- 查看oh my zsh所有的主题 =>
- 修改主题
vi ~/.zshrcZSH_THEME="xxx",默认是robbyrussell
- 系统自带个人觉得不错的主题
- josh
- 3den
- gianu
# 9.4. 配置终端文本
# 9.4.1. 使用艺术字
- 安装艺术字插件
brew install figlet- 测试使用:
figlet AnishHui | lolcat
vi ~/.zshrc- 在
ZSH_THEME="xxx"下面复制上figlet 要显示的内容 | lolcat source ~/.zshrc
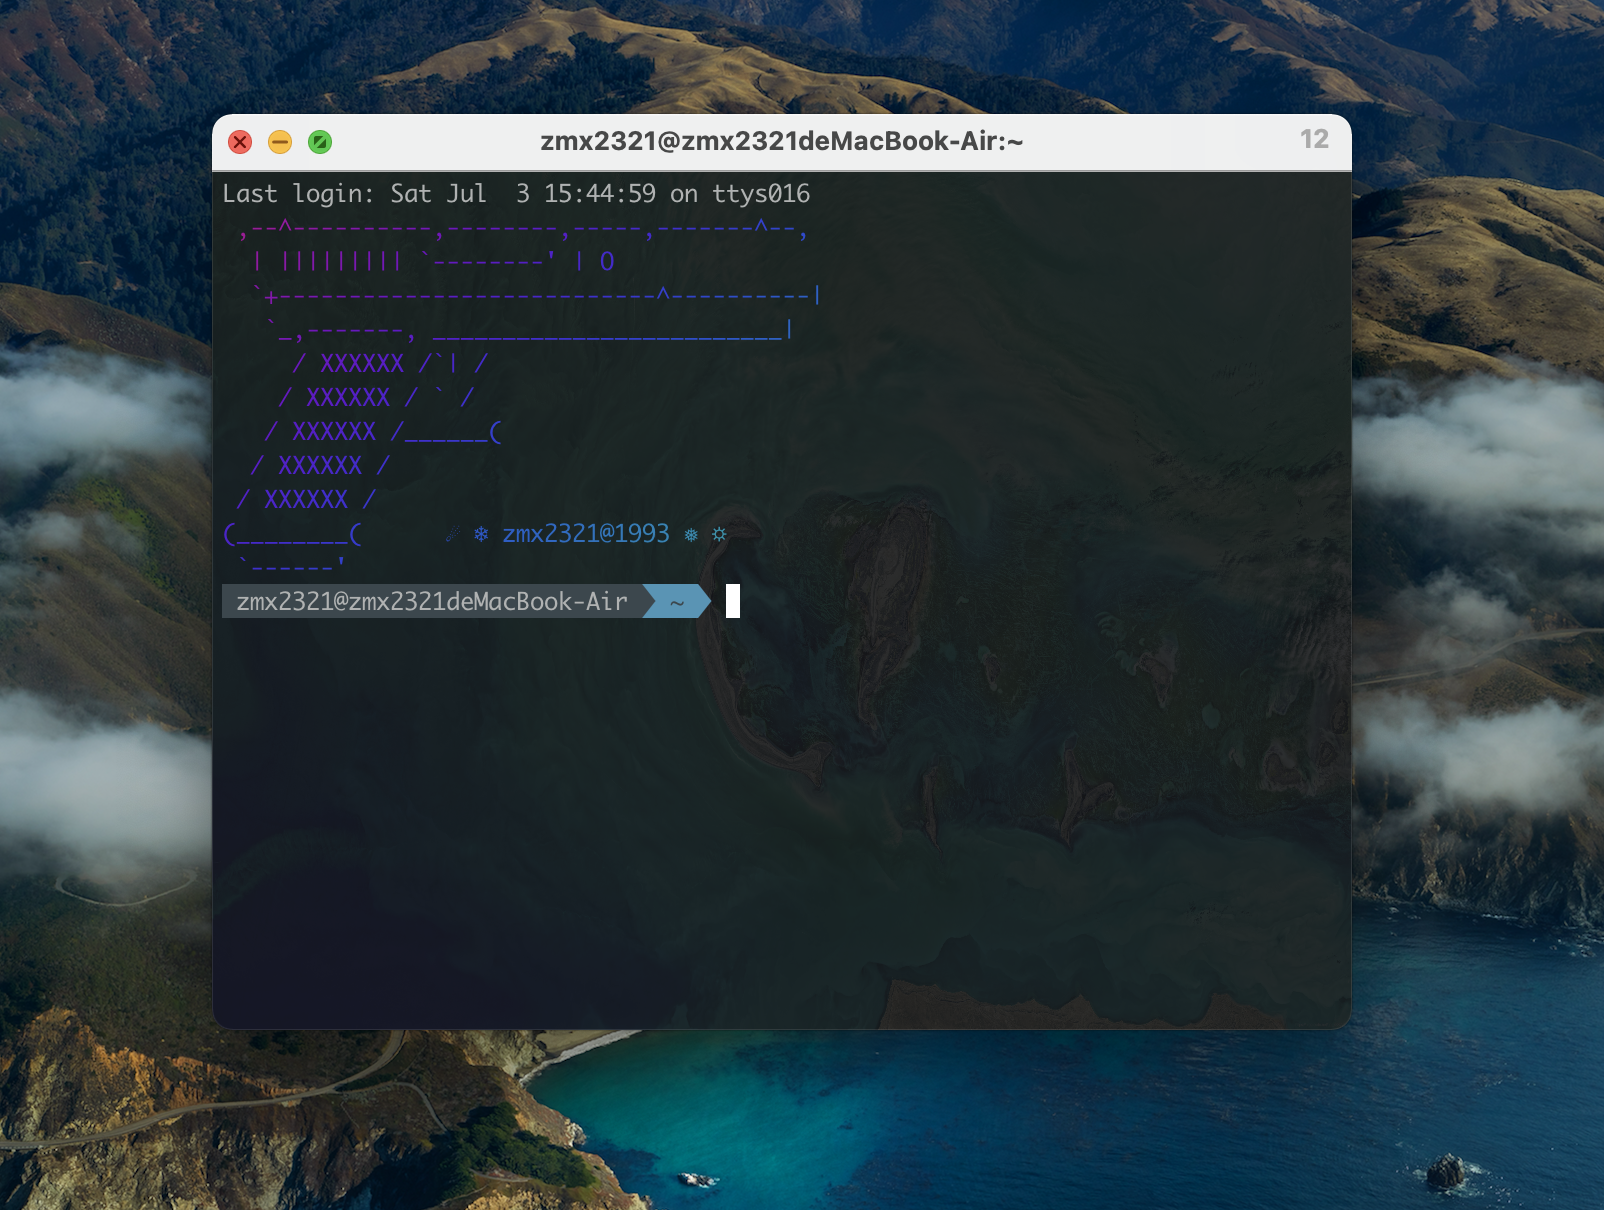
# 9.4.2. 自定义终端文本
- 在某个目录创建记事本写好要显示的内容
 ,--^----------,--------,-----,-------^--,
  | ||||||||| `--------' | O
  `+---------------------------^----------|
   `_,-------, _________________________|
     / XXXXXX /`| /
    / XXXXXX / ` /
   / XXXXXX /______(
  / XXXXXX /
 / XXXXXX /
(________(        ☄ ❄ zmx2321@1993 ❅ ☼
 `------'
1
2
3
4
5
6
7
8
9
10
11
12
2
3
4
5
6
7
8
9
10
11
12
- 要以空行结尾,不然会多出百分号
vi ~/.zshrccat txt文件路径 | lolcatsource ~/.zshrc
# 9.5. 配置主题
自定义的推荐两个主题agnoster和powerlevel10k
# 9.5.1. agnoster
- 找到一个目录:
git clone https://github.com/fcamblor/oh-my-zsh-agnoster-fcamblor.git cd oh-my-zsh-agnoster-fcamblor/./installvi ~/.zshrcZSH_THEME="agnoster"source ~/.zshrc- 此时已经安装和配置好了,但字体还有问题
git clone https://github.com/powerline/fonts.git --depth=1cd fonts./install.shcd ..rm -rf fonts- item2配置:Preferences -> Profiles -> Text -> 勾选use built-in powerline glyphs
- 此时系统里面的配置已经完成了,但vscode里面字体还有问题
- setting => terminal => 在Font Family中添加字体:
Meslo LG M for Powerline- 或者在VSCode的settings.json文件,加入 : "terminal.integrated.fontFamily": "Meslo LG M for Powerline"
# 9.5.2. powerlevel10k
cd ~/.oh-my-zsh/themesgit clone --depth=1 https://gitee.com/romkatv/powerlevel10k.gitvi ~/.zshrcZSH_THEME="powerlevel10k/powerlevel10k"- 运行终端会自行配置
- 如果是初次下载,就会直接进入 powerlevel10k 的配置界面;如果想重新配置,则在终端输入以下代码
p10k configure - 即如果对 p10k 的配置不满意,输入 p10k configure 重新配置
- 如果是初次下载,就会直接进入 powerlevel10k 的配置界面;如果想重新配置,则在终端输入以下代码
# 9.6. item2工具
- 高亮
cd ~/.oh-my-zsh/custom/plugins/git clone https://github.com/zsh-users/zsh-syntax-highlighting.gitvi ~/.zshrc- 找到 plugins,此时里面已经有了git,我们需要把高亮插件 zsh-syntax-highlighting 也加上。zsh-syntax-highlighting 必须放到最后一个
- 在文件最后一行加入以下代码:
source ~/.oh-my-zsh/custom/plugins/zsh-syntax-highlighting/zsh-syntax-highlighting.zsh
- 补全
cd ~/.oh-my-zsh/custom/plugins/git clone https://github.com/zsh-users/zsh-autosuggestionsvi ~/.zshrc- 找到 plugins,添加zsh-autosuggestions
# 9.7. 背景图片
- Preferences -> Profiles -> window -> 看到backgroundImage -> 勾选enabled
# 9.8. item2配置最终效果
# 10. mac查看硬盘损耗
- 安装以及查看
brew install smartmontoolssmartctl -s on disk0smartctl -a disk0
- 说明
- Critical Warning => 重要警告
- 这一项需要观察“原始值”一列的数据,正常情况下应为0。如果显示为1代表当前硬盘处于过热状态;显示为2代表闪存出现严重错误导致可靠性降级,该考虑更换了;显示为3代表闪存已经进入只读状态(寿命用尽,锁盘以保护用户数据)。还有一种状态4是只有企业级固态硬盘才具备的,代表增强型断电保护功能失效(通常是因为电池/电容故障)
- Temperature => 综合温度
- 这一项的单位是热力学温度开尔文,减去273之后就是我们常用的摄氏度了。不同固态硬盘对正常温度的定义是不一样的,通常只有厂商自己的工具箱软件才能明确。例如东芝RC500的正常温度是在79度以下,达到79度后SSD Utility会报告高磁盘温度。
- Available Spare => 可用冗余空间
- 这一项显示的是当前可用于替换坏块的闪存备用块占出厂时总数的百分比,是一项非常重要的健康度指标。配备东芝BiCS闪存的NVMe固态硬盘可以在使用很久后依然保持100%的状态。
- Available Spare Threshold => 备用空间阈值
- 与上一项相关,当可用备用空间低于该阈值时就会发出预警,提醒用户闪存剩余寿命不足,该更换新硬盘了
- Percentage Used => 已使用的耐久度
- 这一项显示的是已经使用的写入耐久度(百分比),平时我们看到的健康度其实就是100%减去已使用耐久度百分比后的结果。
- Data Units Read => 读取扇区计数
- 该项数值乘以1000后即为读取的扇区(1扇区=512字节)数量统计
- Data Units Written => 写入扇区计数
- 该项数值乘以1000后即为写入的扇区(1扇区=512字节)数量统计
- Host Read Commands => 读取命令计数
- 固态硬盘自使用以来累计接收到的读取命令数量统计
- Host Write Commands => 写入命令计数
- 固态硬盘自使用以来累计接收到的写入命令数量统计
- Controller Busy Time => 主控繁忙时间计数
- 该项统计的是主控忙于处理IO命令的时间总和(单位:分钟)。当IO队列有未完成的命令时,主控即处于“忙”的状态。下图所示为东芝RC500固态硬盘的主控芯片
- Power Cycles => 通电次数
- Power On Hours => 通电时间
- Unsafe Shutdowns => 不安全关机次数(异常断电计数)
- 非正常断电是威胁固态硬盘的大敌,我们应该尽可能地避免强制关机。东芝的SSD Utility工具箱软件会自动记录不安全关机次数,并通过活动警告提醒用户关注
- Media and Data Integrity Errors => 闪存和数据完整性错误
- 主控检测到未恢复的数据完整性错误的次数。当有纠错引擎无法校正的ECC、CRC校验失败或者LBA标签不匹配错误发生时,该数值会增加。这一项数值如果不为零,代表固态硬盘工作已经不稳定
- Error Information Log Entries => 错误日志条目计数
- Critical Warning => 重要警告
# 11. mac上安装cnpm
sudo npm install -g cnpm --registry=https://registry.npm.taobao.org --verbosecnpm -v
- 使用cnpm淘宝镜像安装webpack
sudo cnpm install webpack -g
# 12. mac切换到root账户
- sudo -i
# 13. mac上安装mysql
- 先brew info mysql查看下版本信息
- 可以检测是否安装
- brew install mysql直接安装
- brew reinstall mysql 重新安装
- 启动MYSQL服务
- sudo mysql.server start
- 初始化配置并配置密码
- 这一步可以先不做,可以无密码登陆,登陆之后再修改密码
- 这种配置密码的方式比较麻烦,简单密码无法设置,个人练习不建议配置
- mysql_secure_installation
- 附上说明
# 输入root用户密码
Securing the MySQL server deployment.
# 使用空白密码连接(这里表示当前的连接状态)
Connecting to MySQL using a blank password.

# 验证密码组件可用于测试密码并提高安全性。它检查密码的强度并允许用户仅设置以下密码足够安全。您想设置“验证密码”组件吗?
VALIDATE PASSWORD COMPONENT can be used to test passwords
and improve security. It checks the strength of password
and allows the users to set only those passwords which are
secure enough. Would you like to setup VALIDATE PASSWORD component?

Press y|Y for Yes, any other key for No: 这里选y
# 密码验证策略分为三个级别
There are three levels of password validation policy:

LOW    Length >= 8
MEDIUM Length >= 8, numeric, mixed case, and special characters
STRONG Length >= 8, numeric, mixed case, special characters and dictionary                  file

Please enter 0 = LOW, 1 = MEDIUM and 2 = STRONG: 这里选0即可设置简单密码

# 请在此处设置root密码。
Please set the password for root here.
New password: 第一次输入密码
Re-enter new password: 重输入一次确认

# 删除匿名用户?
Remove anonymous users? (Press y|Y for Yes, any other key for No) : 我选y,其他的我没试过

# 禁止远程登录
Disallow root login remotely? (Press y|Y for Yes, any other key for No) : 我选y,因为我只在笔记本使用

# 是否删除测试库
Remove test database and access to it? (Press y|Y for Yes, any other key for No) : 我选y,其他的我没试过

# 现在重新加载特权表
Reload privilege tables now? (Press y|Y for Yes, any other key for No) : 我选y,其他的我没试过
1
2
3
4
5
6
7
8
9
10
11
12
13
14
15
16
17
18
19
20
21
22
23
24
25
26
27
28
29
30
31
32
33
34
35
36
37
- 连接
- mysql -u root -p => 有密码登陆
- 默认123456
- mysql -uroot => 无密码登陆
- 设置密码
- ALTER USER 'root'@'localhost' IDENTIFIED BY 'root';
- mysql -u root -p => 有密码登陆
- 常用指令
- 启动:sudo mysql.server start
- 关闭:sudo mysql.server stop
- 重启:sudo mysql.server restart
- 连接:mysql -u root -p
- 开机启动:brew services start mysql
- 卸载mysql
- brew remove mysql
- 或者brew uninstall mysql
- brew cleanup
- brew remove mysql
- 关于mysql.sock
- 卸载mysql不要听网上说的要删这个文件,删了会后悔
- 在默认情况下,Mysql安装以后会在/tmp目录下生成一个mysql.sock文件,如该文件丢失则Mysql将不能够正常启动,解决方法:使用mysqld_safe 启动或许可解决;
- 进入mysql的bin目录,如:/usr/local/mysql/bin
- 执行./mysqld_safe --user=mysql --basedir=/usr/local/mysql --datadir=/usr/local/mysql/data &
- 安装并破解navicat
- sudo xattr -r -d com.apple.quarantine /Applications/Navicat\ Premium.app
- /Applications/Navicat\ Premium.app部分是由应用程序拖入终端自动生成的
# 14. mac下安装redis
- 官网下载
- redis-6.2.6.tar.gz
- 解压
- tar -zxvf redis-6.2.6.tar.gz
- 编译测试
- 进入到radis路径
- sudo make test
- 编译安装
- sudo make install
- 启动服务器
- src/redis-server
- 启动测试端
- 客户端
- src/redis-cli
- 启动了服务端才能启动客户端
- 测试
- set name abc
- get name
- quit => 退出
# 16. mac下安装nginx
- 打开终端,习惯性命令
- brew update
- 查询要安装的软件是否存在
- brew search nginx
- 查看
- brew info nginx
- 正式开始安装
- brew install nginx
- 进入/bin 目录
- cd /opt/homebrew/opt/nginx/bin
- ./nginx
- 原先的root
- /opt/homebrew/opt/nginx/html
- 启动和root地址在同一级目录,和配置文件不同级
- nginx的配置文件
- cat /opt/homebrew/etc/nginx/nginx.conf
- 配置
- 进入配置文件目录
- open /opt/homebrew/etc/nginx/nginx.conf
- 修改后的root
- listen: 6080
- /Users/zmx2321/Documents/code/_poj
← npm相关笔记